
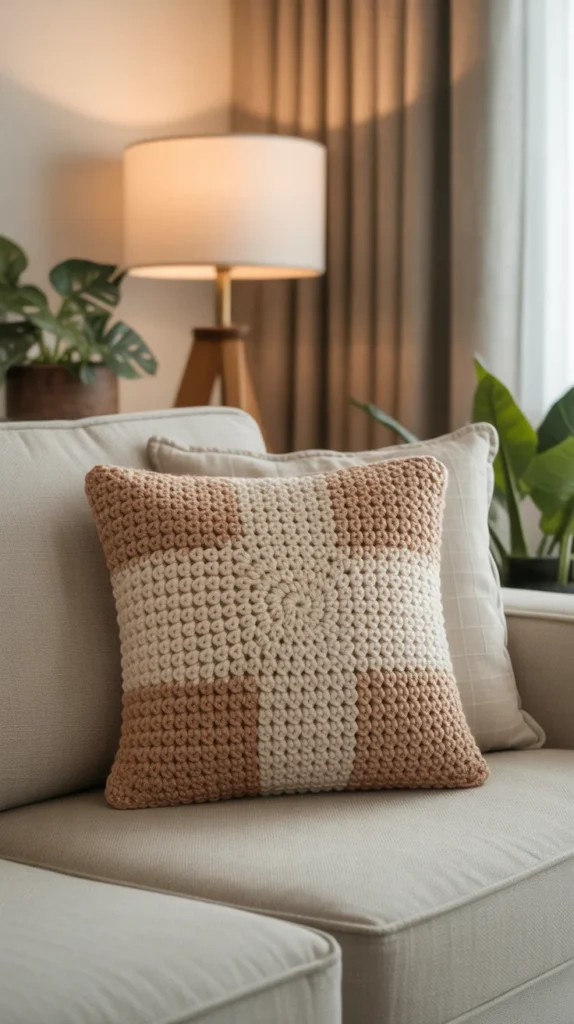
There’s something instantly comforting about a chunky crochet pillow on a couch. It adds texture, warmth, and that “someone lives here and loves it” feeling. The best part? You don’t need to be an expert crocheter to make one. A cozy pillow cover is one of those projects that looks impressive but is very forgiving.
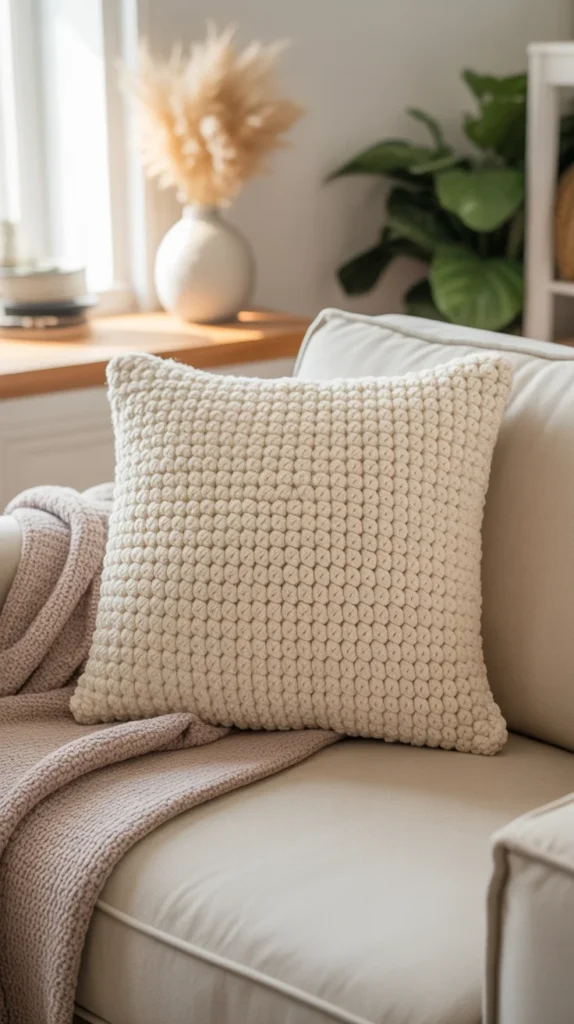
This guide walks you through the process step by step, with practical tips to help your pillow cover look polished, soft, and couch-ready.
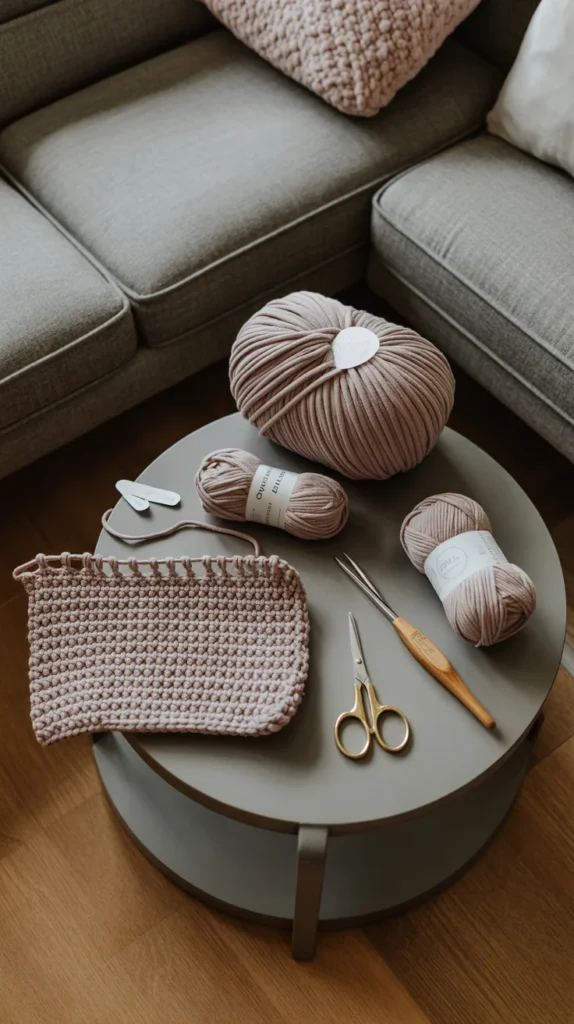
Choose Yarn That Feels Cozy and Holds Shape
The yarn you choose sets the mood of your pillow cover. For couch pillows, you want something soft but sturdy.
Best yarn options
- Chunky or bulky yarn for instant coziness
- Wool blends for warmth and texture
- Cotton yarn for a cleaner, lighter look
- Chenille or velvet yarn for ultra-soft pillows
Avoid very thin yarn unless you want a lightweight, decorative cover.
Color tips
- Neutral tones feel calm and timeless
- Earthy colors add warmth
- One solid color often looks more high-end than stripes
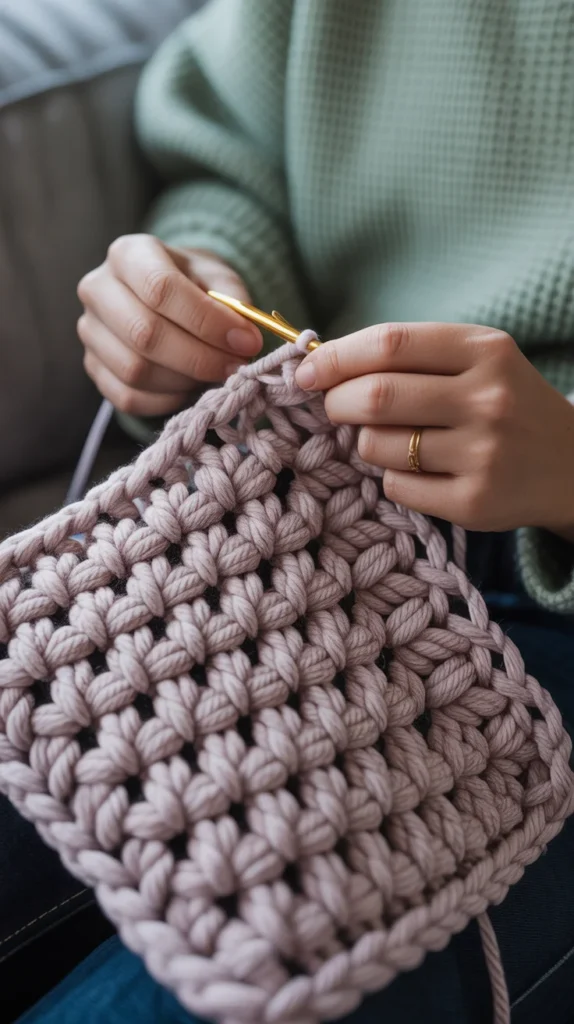
Pick a Simple Stitch That Adds Texture
You don’t need complicated stitches to make a pillow look beautiful. Texture comes from repetition and yarn choice.
Beginner-friendly stitch ideas
- Single crochet – tight and structured
- Half double crochet – soft with subtle texture
- Moss (linen) stitch – popular for pillow covers
- Front-post stitches – add raised texture
Choose one stitch and stick with it. Consistency keeps the design calm and cohesive.
Stitch tips
- Keep your tension even
- Use a hook size that feels comfortable for long rows
- Test a small swatch before starting
Measure Your Pillow Insert First
Always build your cover around the insert, not the other way around.
Common pillow sizes
- 16 × 16 inches
- 18 × 18 inches
- 20 × 20 inches
For a full, cozy look:
- Crochet the cover about 1 inch smaller than the insert
- This prevents sagging and keeps corners plump
You can make:
- A one-piece envelope cover
- Or two panels sewn together
Crochet the Pillow Panels
Most cozy pillow covers are made with simple rectangular panels.
Panel method
- Chain to match the width of your pillow insert
- Crochet rows until the panel reaches the correct height
- Make two identical panels
If you prefer an envelope-style back:
- Crochet one full front panel
- Crochet two smaller back panels that overlap
This makes removing the pillow easy and avoids zippers.
Assemble the Pillow Cover
Once your panels are ready, it’s time to put everything together.
Joining options
- Single crochet seam for a visible, textured edge
- Slip stitch seam for a flatter look
- Whip stitch with yarn needle for a clean finish
Turn the cover inside out before inserting the pillow if you want hidden seams.
Assembly tips
- Line up corners carefully
- Stitch slowly to keep edges straight
- Check fit before closing the final side
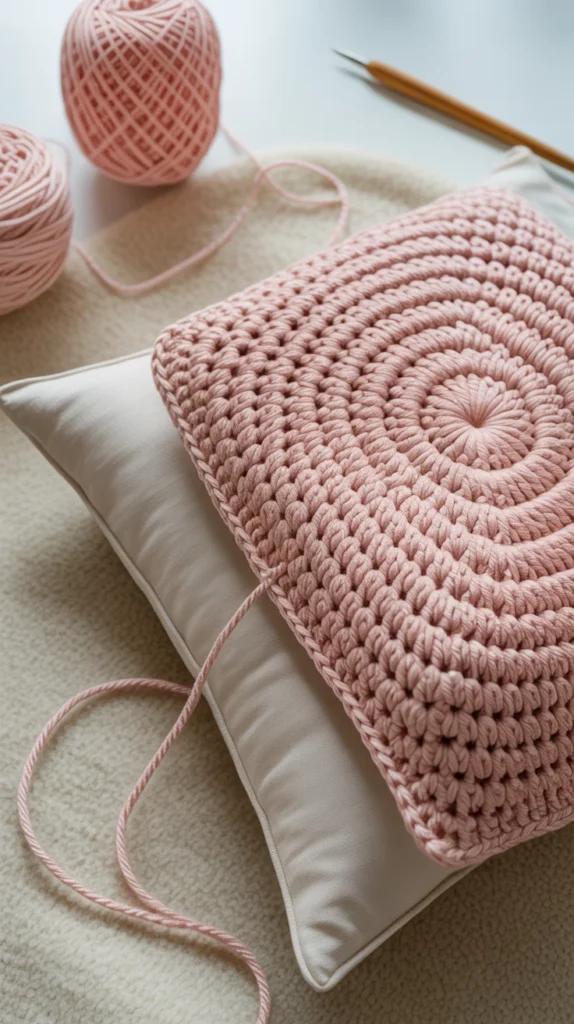
Add Cozy Details (Optional)
Simple details can elevate your pillow without making it busy.
Easy decorative ideas
- Front-post rows for subtle stripes
- Bobble stitches in a small section
- Buttons on an envelope back
- Tassels on two corners only
Keep embellishments minimal so the pillow stays cozy, not cluttered.
Finish Cleanly for a Polished Look
Finishing is what makes your pillow look store-bought instead of rushed.
Final checklist
- Fasten off securely
- Weave in all yarn ends neatly
- Trim loose fibers
- Lightly block if edges curl
Blocking isn’t always required, but it helps square corners and smooth stitches.
Care Tips for Crochet Pillow Covers
A cozy pillow should also be practical.
Care basics
- Spot clean when possible
- Hand wash gently if needed
- Lay flat to dry
- Avoid high heat
Cotton yarns handle washing better than wool or chenille.
Final Thoughts
Crocheting a cozy pillow cover is one of the easiest ways to refresh your couch without buying new decor. It’s beginner-friendly, customizable, and incredibly satisfying to finish. One simple pattern can create many looks just by changing yarn or stitch choice.
🧶 Save this tutorial for later, grab your yarn, and start crocheting a pillow cover that makes your couch feel like home.

Leave a Reply