
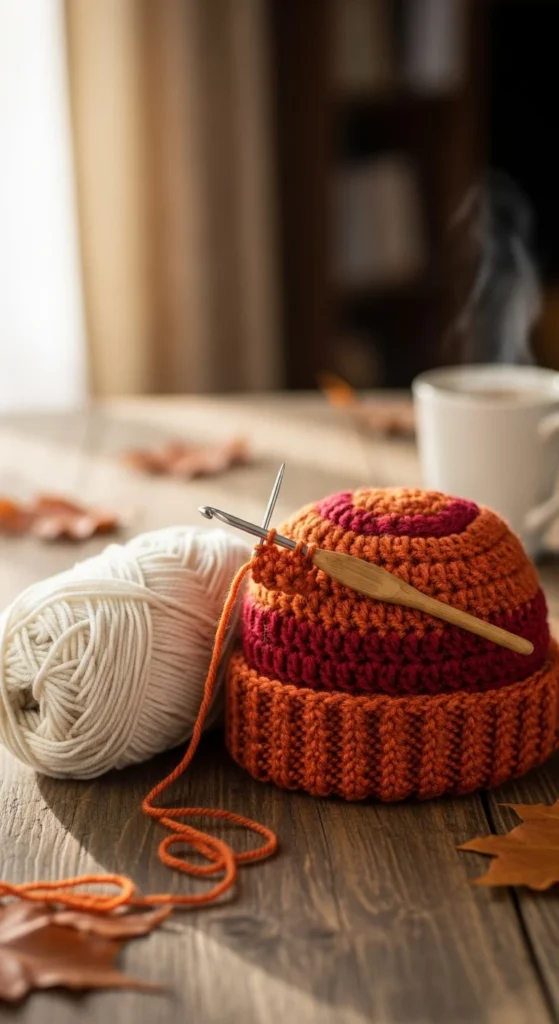
There’s nothing better than pulling on a warm beanie you made yourself when the weather turns chilly. A crocheted beanie is practical, stylish, and surprisingly beginner-friendly. You don’t need advanced skills or fancy tools—just yarn, a hook, and a little time. This guide walks you through each step so you can crochet a cozy beanie that keeps you warm all fall and winter.
What You Need to Crochet a Beanie
Getting the right supplies makes the whole project smoother.
Basic supplies
- Medium-weight or bulky yarn (for warmth)
- Crochet hook (5 mm–6.5 mm works well)
- Scissors
- Yarn needle (optional but helpful)
For fall and winter, choose yarn that feels soft and insulating. Acrylic blends are easy to wash. Wool blends feel extra warm. Avoid slippery yarns if you’re a beginner.
One skein is usually enough for a basic beanie. If you want a slouchy style, grab a little extra.
Choosing the Best Stitch for Warmth
Beanies rely on texture to trap heat. Simple stitches work best.
Beginner-friendly stitches
- Half double crochet (soft and dense)
- Single crochet (very warm and snug)
- Double crochet (lighter, better for fall)
Half double crochet is a favorite for beanies. It builds quickly and feels plush without gaps.
Stick to one stitch for the whole hat. Consistency keeps the beanie neat and comfortable.
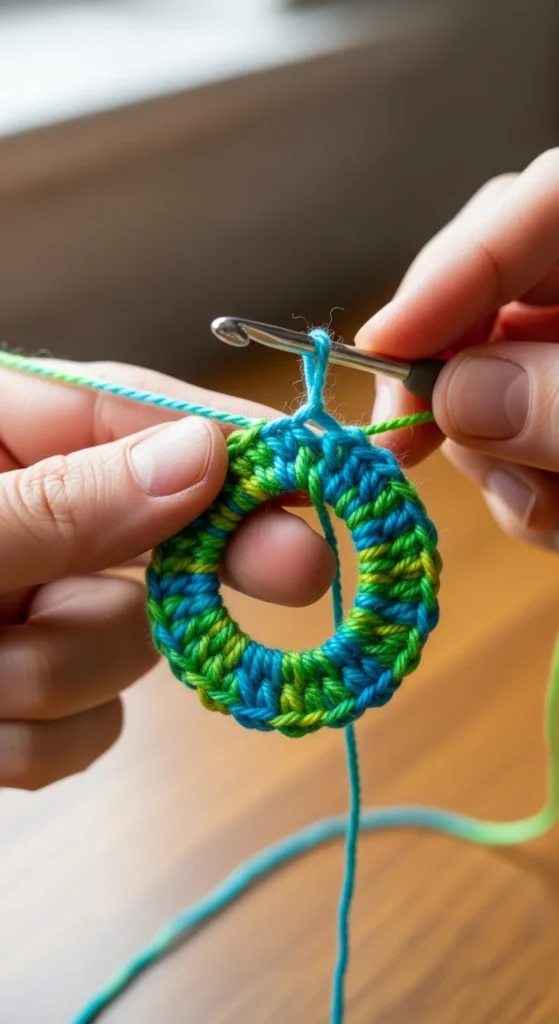
Starting With the Magic Ring
Most beanies are crocheted from the top down. That starts with a magic ring.
Magic ring steps
- Wrap yarn around your fingers to form a loop
- Insert hook and pull up a loop
- Chain two to start
The magic ring lets you tighten the center so there’s no hole at the top of the hat.
If this feels tricky, practice once or twice. It becomes easy with repetition.
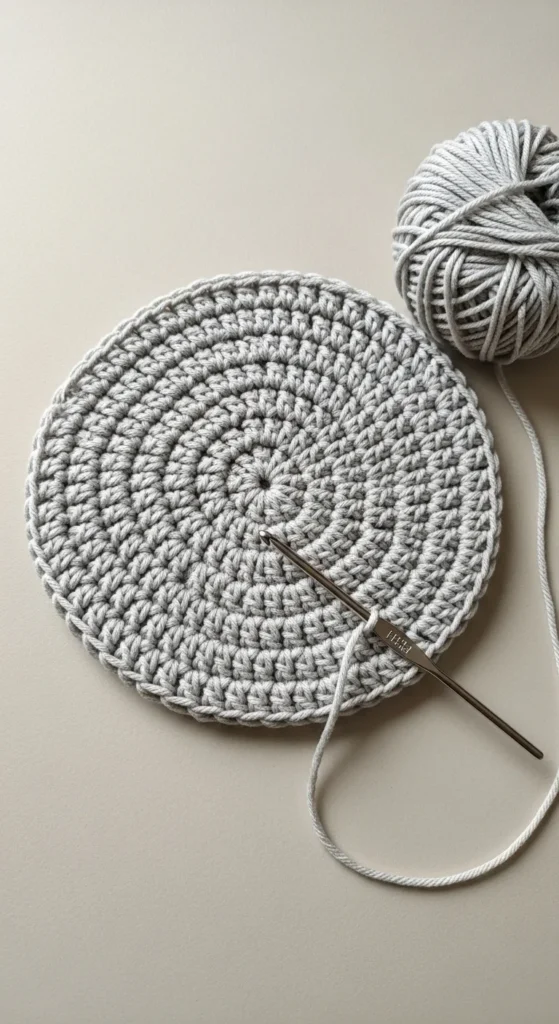
Crocheting the Top of the Beanie
The top of the beanie grows in rounds.
Basic top pattern
- Work 10–12 half double crochets into the magic ring
- Join with a slip stitch
- Chain two and start the next round
Each round increases evenly so the circle stays flat. You’ll add a few stitches in each round.
After several rounds, the piece should look like a flat circle. Keep going until it matches the width of the crown of your head.
Building the Sides of the Beanie
Once the top is wide enough, stop increasing. This is when the beanie starts to take shape.
Side rounds
- Crochet one stitch into each stitch
- Do not add increases
- Join each round and chain two
As you continue, the edges will curl downward naturally. That’s a good sign.
Try the beanie on after a few rounds. Keep crocheting until it reaches your ears or desired length.
For a slouchy beanie, add a few extra rounds.
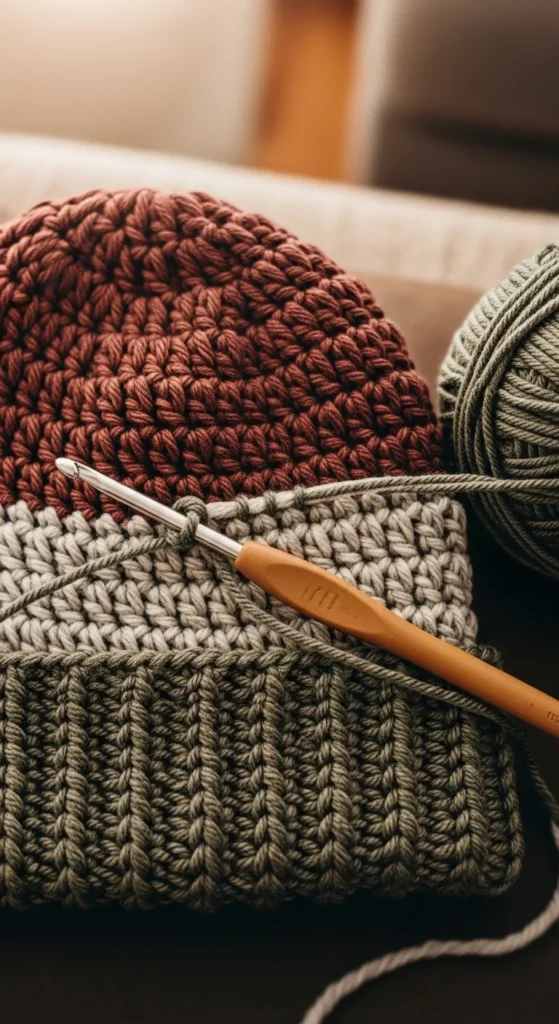
Creating a Snug Brim
The brim helps the beanie stay in place and keeps your ears warm.
Simple brim option
- Switch to single crochet for the last 2–3 rounds
- Work through the back loop only for texture
This creates a ribbed look without extra steps.
If you want a folded brim, add a few more rounds before finishing.
Finishing Off the Beanie
When the length feels right, it’s time to finish.
Finishing steps
- Slip stitch to close the round
- Cut yarn, leaving a 5–6 inch tail
- Pull yarn through the loop
- Weave the tail into the inside stitches
Turn the beanie inside out and check for loose ends.
You can add a pom-pom if you like, but the beanie looks great on its own too.
Tips for a Better Fit
Fit matters with hats. Small adjustments make a big difference.
Helpful tips
- Use a smaller hook for a tighter fit
- Add fewer stitches for a snug beanie
- Add more rounds for extra length
Everyone’s head size is different, so trying it on as you go helps a lot.
Final Thoughts
Crocheting a warm beanie is a perfect fall and winter project. It’s quick, useful, and satisfying from start to finish. Once you make one, you’ll want to make more in different colors and styles.
🧶 Save this guide for later and start your cozy beanie today—you’ll be wearing it before you know it.

Leave a Reply